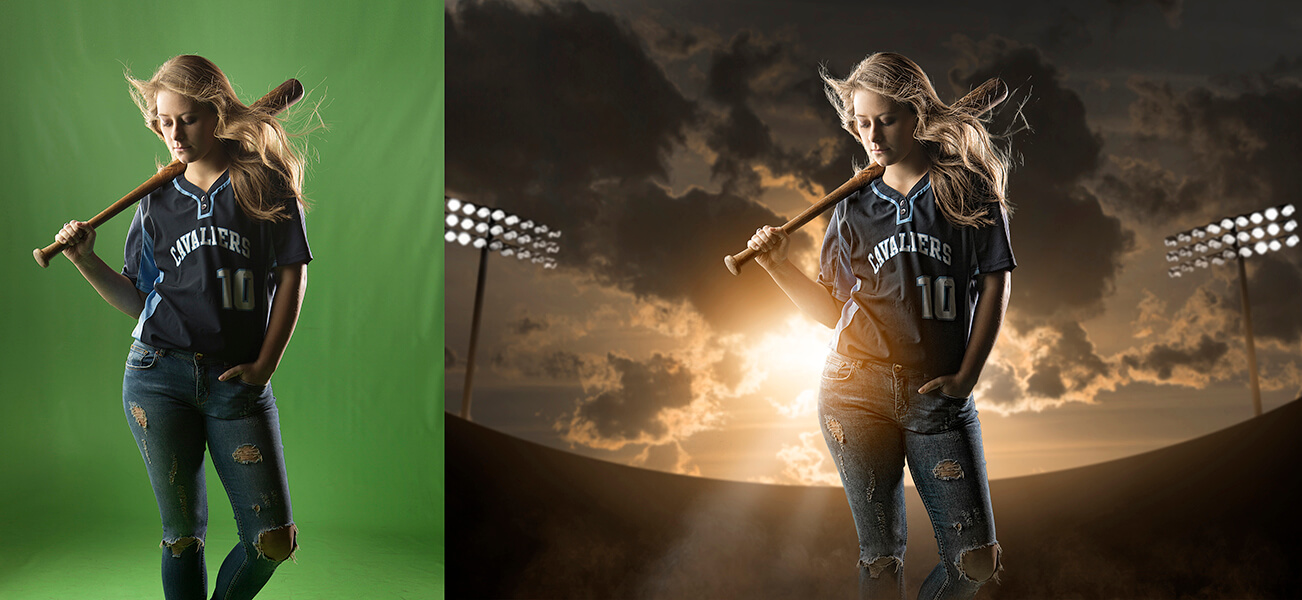
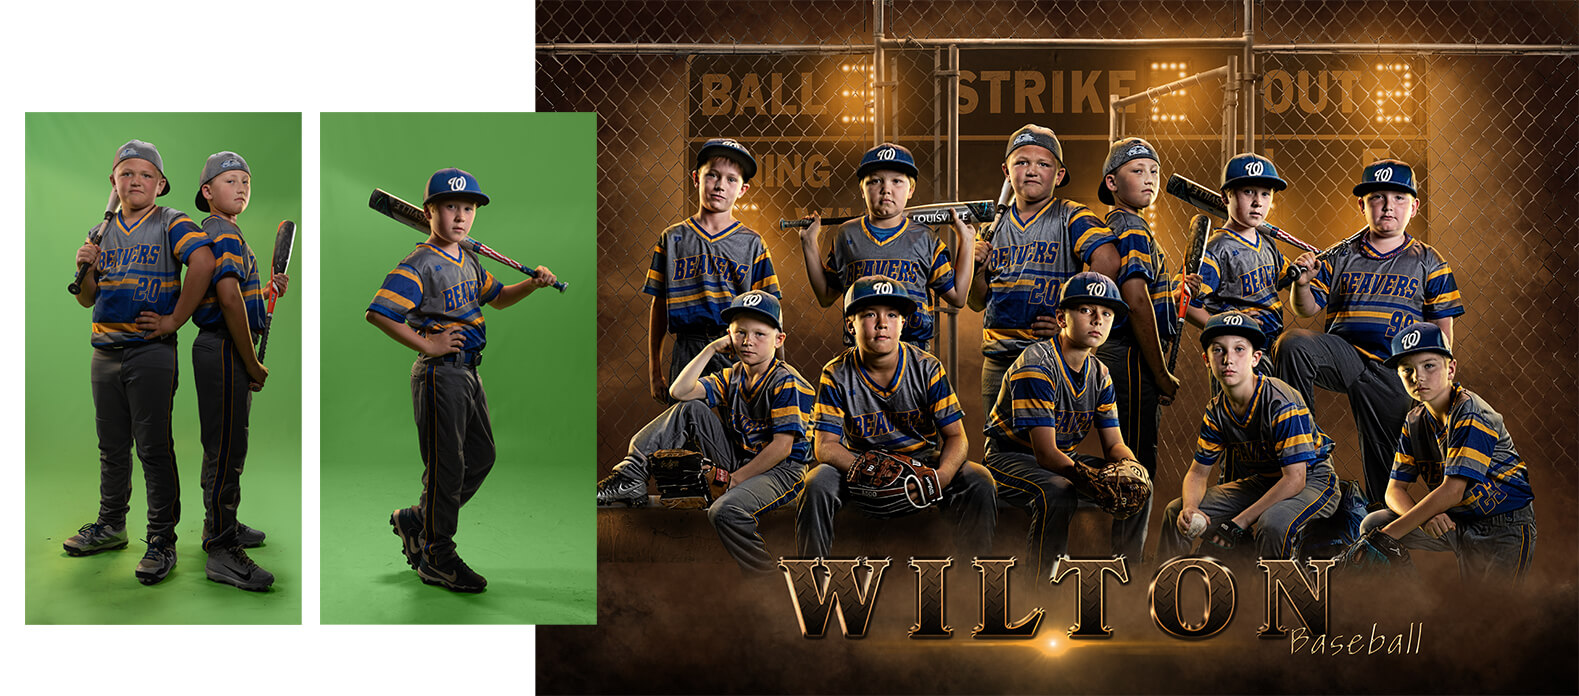
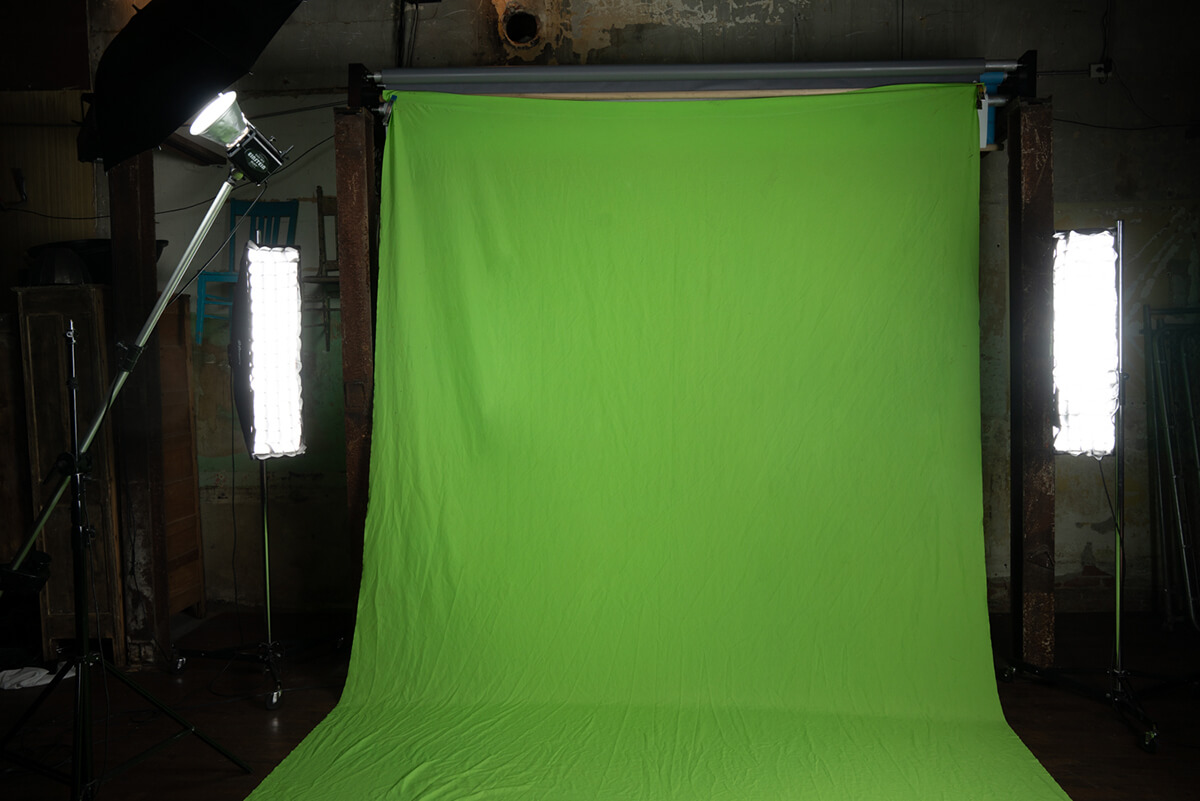
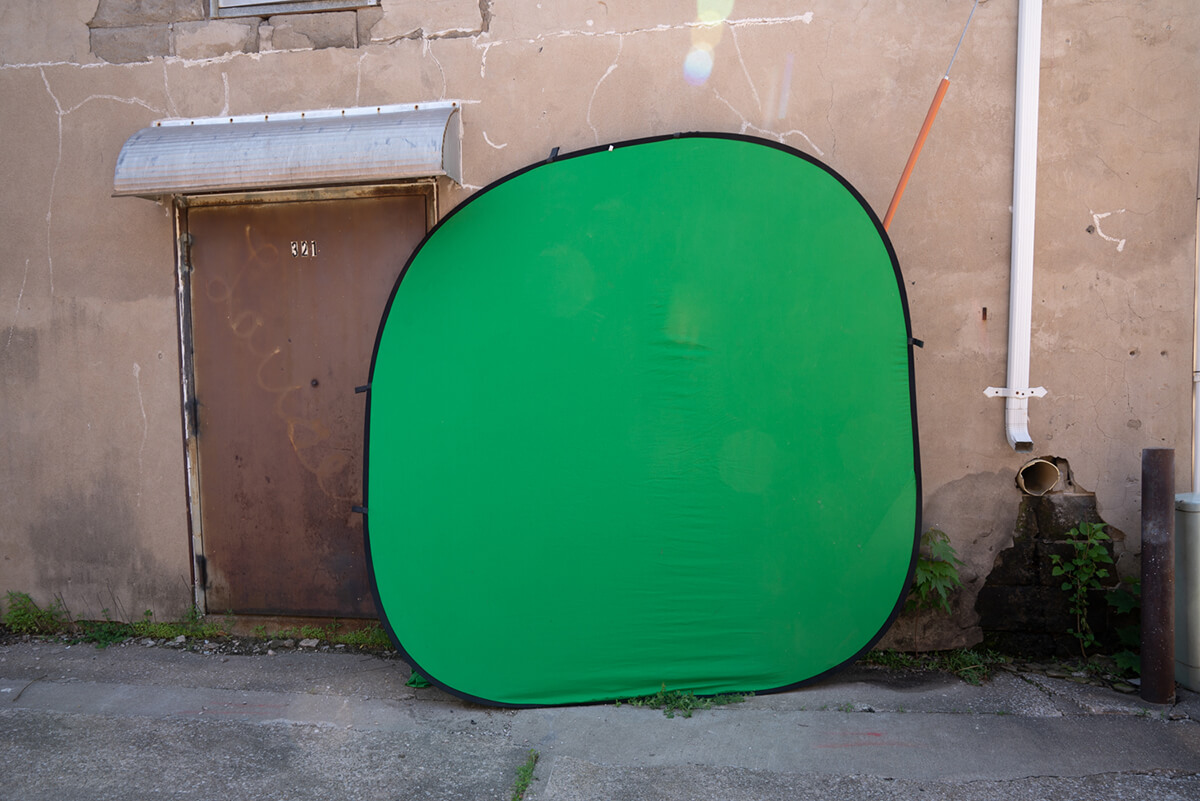
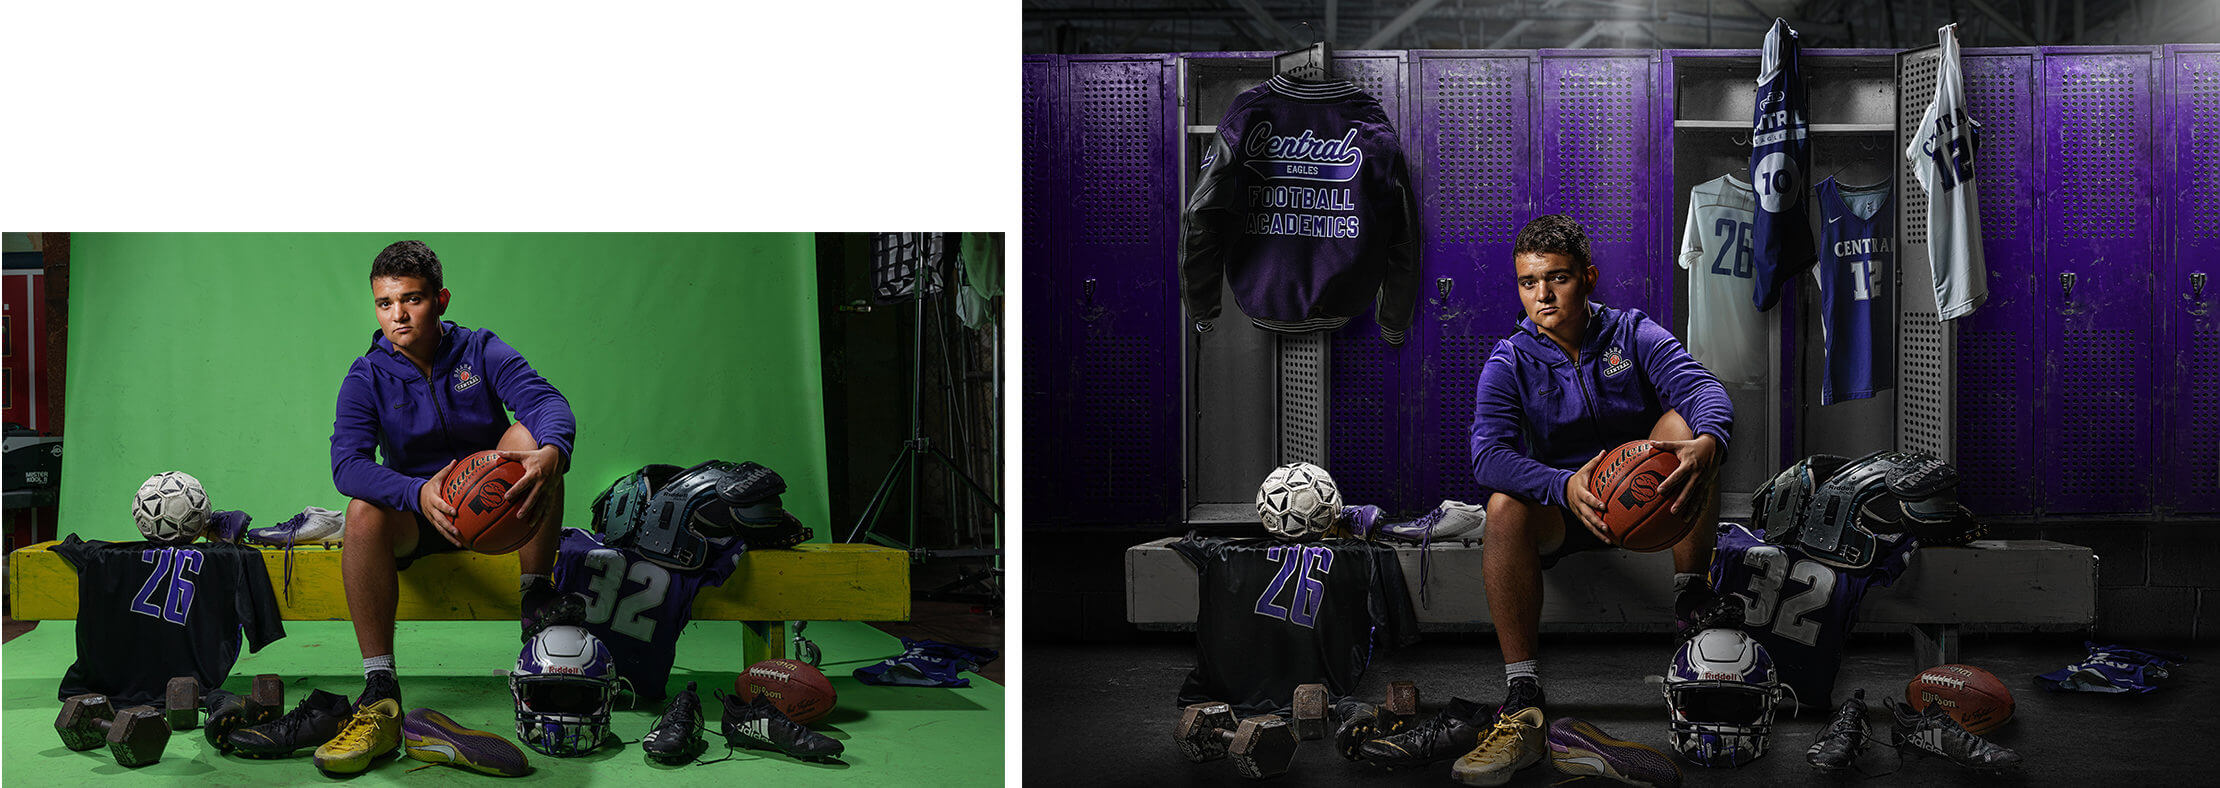
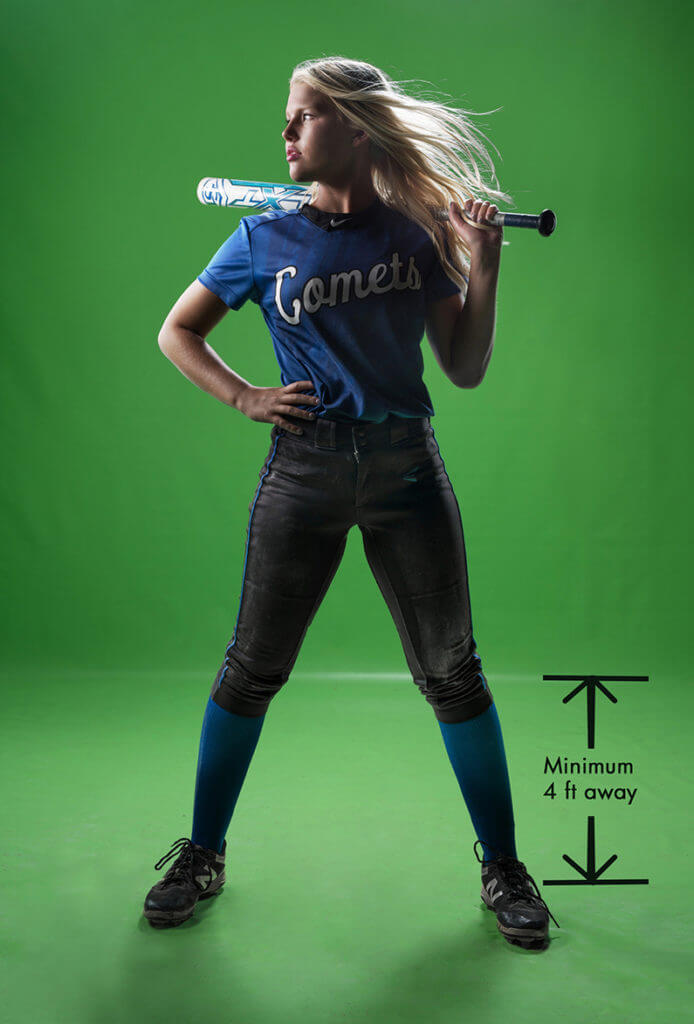
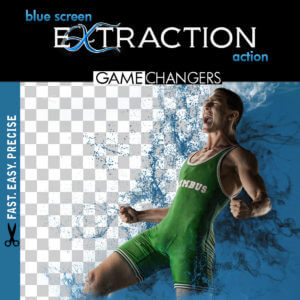
Why Use Green Screen Photography?

Photoshop is an amazing program for composites and effects and there are many techniques you can use to extract a subject from a background.  You can photograph a subject in the middle of a street or a forest and still remove the background.  However if you are looking for a fast easy way then you should consider using a green screen. Green screen is the industry standard for extractions. Any Hollywood movie, special effects, and weatherman uses green screen.

Why? With the help of computers you can near instantly extract a subject from a decently lit green screen. Green screen even enables you to batch extract folders of hundreds of subjects while you get a cup of coffee. This makes it the ideal option for photographers looking for something amazing to offer their sports teams, schools, children, seniors, and clubs.

Green screen is the perfect option for anyone who wants to create a cool composite. Instant extractions allow you to immediately get to the fun part of compositing instead of spending hours of frustrating work on an extraction.

Stadium Sundown Photoshop Template

green screen photoshop extraction action for baseball team poster with scoreboard and fence

Scoreboard Glow Photoshop Template

How to Get the Best Results Using Green Screen Photography

— click the arrows to expand —

STEP 1 - SELECT YOUR GREEN SCREEN

There are many green screen material options available and the one that is right for you depends on how you plan to use it.

green screen fabric, vinyl, pop up

Green Screen Background Options

CLOTH folded up, VINYL rolled up, and TWIST FLEX folded down. (PAPER not pictured but rolled similar in style to vinyl).

SEAMLESS PAPER

Fairly inexpensive, it lays flat, and if part of it gets dirty then all you have to do is tear it off and unroll a little more. The downside is that it tears easily — especially when taking pictures for volume sports teams and they are walking on it or during action shots.  It can also take up some room if you are transporting it because it doesn’t fold.

paper green screen

Seamless Paper Backdrop

POLY CLOTH

Durable and you can wad it up into a ball which makes it easy to pack and store. Also washable if it gets dirty from athletes’ shoes or a baby’s mess!  The downside is that you have to spend a little extra time making sure that you pull the background tight so there are no wrinkles when photographing.  You can see in the second image below there are a few wrinkles.  Small wrinkles extract pretty easily but big wrinkles can cause a headache. Wrinkles add texture and can add more time to extracting in Photoshop.

Twist Flex

Lightweight and folds up into a hula hoop-like circle. Typically inexpensive and great for a quick shot or two during a multi-location shoot. When they open they stretch the background material enough so that there are not many wrinkles.  They can come in a variety of sizes and some even come with a fabric floor that you can pull out.  Smaller ones are meant for headshots.  Larger ones allow for 3/4 body shots and possibly even whole body — but if arms are stretched out or the athlete is jumping then pop ups probably won’t be big enough. Even with one of the largest pop ups available – 8 ‘x 8’ pictured below – when the subject is standing a few feet away their body quickly fills up the screen!

green screen on location

Twist Flex Backdrop

Great for On Location Headshots & up to 3/4 Body Shots

Vinyl

Durable, easy to clean, lasts nearly forever, lays flat and doesn’t wrinkle! The downside is that it is bulkier to transport because it doesn’t fold. Because it is such a durable, long lasting product, it is a little more costly — however over the long run not more expensive than having to replenish your seamless paper supply!  We prefer this option due to all of the full body, action shots we photograph.

We found Denny Mfg to have the highest quality vinyl backdrop out there and use it for nearly all of our sessions.  If you’re interested in getting one too — enter code SHIRK25 in the customer comments section when placing your order on their site to get 25% off your cart (excludes sale items)!

athlete basketball player on green screen vinyl

Vinyl Backdrop

10′ x 24′ works great for full body and athlete action shots

LIGHTS

You can use a variety of equipment to light your subjects.  For lights in the studio, we use Einstein’s from Paul C Buff company. They are fairly inexpensive compared to many professional lights and their recycle time (time between flashes) is super fast — especially helpful when shooting athlete action shots!  On a smaller budget?  No worries – in our early days we used any lights we could afford and still created some awesome images. Just two lights can work, but in many cases you will want at least three lights. We prefer to have five lights available to be able to exactly control the light from any direction. We don’t always use all of them but they are nice to have just in case.


MODIFIERS

We have a bunch of options for modifiers and often switch between them to try out different lighting scenarios. The thing to know about light modifiers is that larger modifiers typically produce softer more gradual shadows.  Smaller light sources produce harder edged shadows.

For our main light we have been preferring a medium sized softbox or sometimes an umbrella. They offer flexibility for both soft or dramatic lighting on the subject.

For our back lights we most often use two 18×36 strip boxes with grids (see image below).  Using back lights will help in defining the subject from the background and also extracting. Using grids on your back lights will help reduce the chances of light flare in your lens and also help concentrate the light in a specific area.

We also sometimes add a hair light with a standard 8” can plus a 20 degree grid to help contain the light.

We use a 30” white umbrella for specifically lighting my green screen.


CAMERA GEAR

For our camera we use the Sony A7R4. We love how the focus will track a subject and focus directly on the eye — even during an action shot!  We always shoot in RAW as it offers the most flexibility for adjusting lighting and colors later.

Our typical lens for composites is a 24-70mm.  It allows us to zoom out very wide if a subject is jumping or moving, and we can also zoom in if needed.

We highly recommend selecting your template/background before you photograph your subject for a composite.  Knowing your background allows you to take into consideration the lighting, positioning, and angles that your subject needs to be in to make them easily blend into and look amazing in the new digital background.

Also, when you can show a sample of the background your client before you photograph them- they’ll be able to better visualize what you are going to create for them. This can help create more excitement and desire for the finished product.
 

We recommend selecting your background and knowing how you are going to pose your subject — trust us it makes your photo session so much easier and faster!  When you know exactly what poses work, you’ll be more confident when working with your subject and it will show! If you haven’t selected or studied your background before your photoshoot, you’ll probably need to take a bunch of different poses and just hope something works.  

Knowing whether a subject is going to look best standing, sitting, jumping, is important.  Some backgrounds have elements or an object that you need to take into consideration for positioning your subject.  Below is a sample of a basketball player photographed for our Hoop Dreams Photoshop Template. You can see that the subject was simply sitting on a stool with his feet propped up on objects at different levels so that he would fit just right into the pile of balls in the template.

Hoop Dreams Photoshop Template


When trying to replicate a image, we have found that seeing an example of what the original subject looked like on green screen BEFORE extraction definitely helps visualize how to achieve it.  All Game Changers templates therefore include some of our original green screen images to make this easier for you!

Locker Room Photoshop Template


When posing your subjects, be sure to move your subject away from the background. A minimum of 4 ft from the background is suggested. The further away the better. By moving your subject away from the background you will greatly diminish the chance for green spill from behind. In addition, by moving your subject away from the background, your subject’s shadow won’t show up on the background.

softball athlete posing on green screen with bat and long blond hair for simple easy extraction

If you plan on capturing a full body shot then have your subject stand at the very front edge of the green screen floor so that there is much less possibility that green could spill on the front of your subject.

green screen soccer player action shot for extraction and compositing

If you are capturing a three quarter or head and shoulders portrait then do not use a green floor and remove the possibility of green spill on the front of your subject entirely.

green screen football athlete headshot for extracting and compositing

How you light your subject is going to vary depending on the template or background that you plan on using.  Hopefully you study the background you are going to use before photographing your subject.  Game Changers templates include lighting diagrams and directions (see sample below) because knowing exactly where to place your lights makes photographing your subject a whole lot easier!

As you’ll notice in our templates, many of our subjects are athletes. Athletes love dramatic tough images. Most are not looking for cuddly soft images. Therefore we use dramatic lighting — and as a general rule we move our main light way off to the side until we see shadows in our subject’s cheek bones.

Green screen picture displaying dramatic light vs broad light on athlete

Most backgrounds and templates have some kind of light coming from behind – stadium light, street light, sun – therefore using a backlight on the subject is important to making them fit.  Lighting from behind also helps define and separate the subject from the green screen and makes it easier to extract them (especially with long flowing hair).

stadium lights photoshop template football background

To make the athlete look as imposing as possible we often photograph from a lower level – knee to waist height. This makes them appear taller and stronger than photographing from a higher angle.


When setting up your lights don’t aim your lights at the green screen floor. If you aim bright lights at the floor then the green is likely to bounce onto your subject. Take a few moments to ensure that your lights are not shining too harshly on the floor.  If you are using a hair light, in most cases you should try to avoid pointing an overhead hair light directly down at the green screen.  Place it behind the subject but at an angle that hits the subjects head and continues past the front edge of the green screen.

Make sure that your green screen is actually green in your image. If your green screen is turning a dark forest green when you take a picture then the actual color is not true green screen. We often designate at least one light with an umbrella modifier to help ensure the green screen doesn’t turn out dark and sometimes two lights pointing towards the background are necessary to get an even light across the green screen.  Too much light can be bad too.  If your background is lighter than my well lit green screen sample then you need to turn the power of your lights down.

Green screen sample images showing well lit green screen vs poorly lit green screen

If you have your camera set up to capture images in RAW then you will first need to process your image.  There are many RAW processors and most work very similarly – we use Lightroom.  RAW images contain a lot more information than a jpeg and give you much more flexibility if you decide to brighten, darken, or adjust colors.  Do any adjusting necessary in your RAW processing software then export to Photoshop.  We typically export our adjusted files as 300 dpi jpegs at whatever size the client has ordered.

Once in Photoshop we do any normal retouching required (blemish removal, teeth whitening) before extracting.

There are many different ways you can extract a subject in Photoshop. However, the entire purpose of photographing on a green screen background is so that the extraction is fast and easy. We use our Extraction Action and it only takes a few seconds for our image to be ready to composite.  There are also services on the internet that you can pay to have extractions done for you — however that typically takes a day or so to get the extraction back… and just because someone else is doing the work does not mean the extraction will be high quality!

A good extraction will typically be created with a mask. A mask is nondestructive way of erasing and enables you to add or subtract from the original image at any moment. For example, if you extract someone and then add the extraction to a scene, you may realize that you accidentally removed something vital – such as a finger or part of a shoe.  If the extraction was created with a mask you will be able to easily add the missing element back.

green screen extraction with photoshop mask

After our subject is extracted, we often add an additional layer of enhancement to our subjects that gives them a bit more pop. We call it our Intensify Action. Playing this action creates two additional layers that increases the detail and depth. We use the depth layer to enhance any edge light that we really want to pop and often darken down areas that we don’t want to be distracting.

Once our image is extracted and all enhancements finished we often have multiple layers that make up the finished extraction. To keep things simple we prefer to group all the layers into a single folder to make it a nice neat package in Photoshop. We have actually programmed our Extraction Action to group the important layers automatically into a folder.  We then save the extraction as a .psd in the client’s file.

There are multiple ways to do just about everything in photoshop. Don’t make adding an extracted subject to a new image complicated.  Think Drag and Drop!

SIMPLE DIGITAL PHOTO / BACKGROUND

The benefit of a flattened simple background is that you don’t have to navigate multiple layers. Your subject will automatically be on top of the scene.

The downside is that the scene is not set up to be easily changed or adjusted. There are no additional layers to help make your subject better fit or blend into the scene. Manipulating the scene will require time and more advanced knowledge of Photoshop. 

HOW TO: 

Open the background file you want to use in Photoshop. 

Open up your extracted subject in Photoshop.  In the layers palette, select the layers (or folder) that you want to move into the template.  Drag the layers (or folder) over top of the background image.  Once your mouse is above the background that you want to add them to, release the layer/s. TADA! Your extracted image is on your new background.

Size and position your subject using your transform controls. The quick keys for your transform controls are (PC) ctrl T,  (Mac) cmd T.  You may need to do some additional adjusting in photoshop to make your subject fit well.

LAYERED PHOTOSHOP TEMPLATE

The benefit of layered templates is that they will often include multiple layers that will help your subject fit and blend into the scene. Instead of your subject simply floating on top of a scene, they will be compressed inside of the scene with elements both in front and behind the subject. Some templates even include toning options to help make the colors of the subject and background blend.

Score Photoshop Template

With a layered template you can also adjust, manipulate and reuse the individual elements to create your own unique looks. This adds a huge amount of value for most photographers because it is like getting a bunch of useful stock images all at once.  For example on the template below with the scoreboard —there are lots of useful elements like a scoreboard, sky, grass, stadium lights, bench and football.  These elements can easily be manipulated within the template or you can re-purpose the elements to create something new for your subjects.

Templates like these can have lots of layers.  If you are new to Photoshop then it may take a little bit more time to orient yourself to where all the parts are.  To solve this, most Game Changers templates include detailed tutorial videos to show you how to quickly and easily use each feature and layer of the template.

Game Time Football Photoshop Template

HOW TO:

If your template includes a tutorial video be sure to watch it first!  

Open your layered template in Photoshop by double clicking on the .psd file.  The template will open in photoshop.  In the layers palette, click on the layer that you want your subject to be added to.  In Game Changers templates this layer is labeled “Insert Subject Here”.

Open up your extracted subject in Photoshop. In the layers palette, select the layers (or folder) that you want to move into the template.  Drag the layers over top of the template.  Once your mouse is above the background, release the layers. Your subject will appear in the template.

Size and position your subject within the template using your transform controls.  The quick keys for your transform controls are (PC) ctrl T,  (Mac) cmd T. Now you can customize the look of the template to fit your vision using the layers and options included in the template.

p.s…keep an eye out for a new post coming soon on how to get the best results using layered Photoshop templates!

Congrats! You’ve created an amazing new image. It took some effort and skill to light, position and photograph your subject.  You’ve invested time and probably some money into your equipment and the creation of your image.  If you are doing this as a business then hopefully you have set yourself up for a successful sale.

If you would like to learn more about selling composites then keep an eye out for a new post coming soon on selling composites.

BEST SELLER
BEST SELLER

Layered Photoshop Templates

Locker Room Photoshop Template + Tutorial

$149
BEST SELLER
$149$174
$49$74

Leave a Reply